Adding a card
Quick start
Tap + in the wallet. Point the camera at the barcode and Cardly reads it by itself. Then it asks for a Photo of the back and a Photo of the front; tap Take Photo, or Skip. Last come the details: check them and tap Save, and the new card opens.
No barcode, or it will not scan? Tap Enter Manually to go straight to the details and type the number.
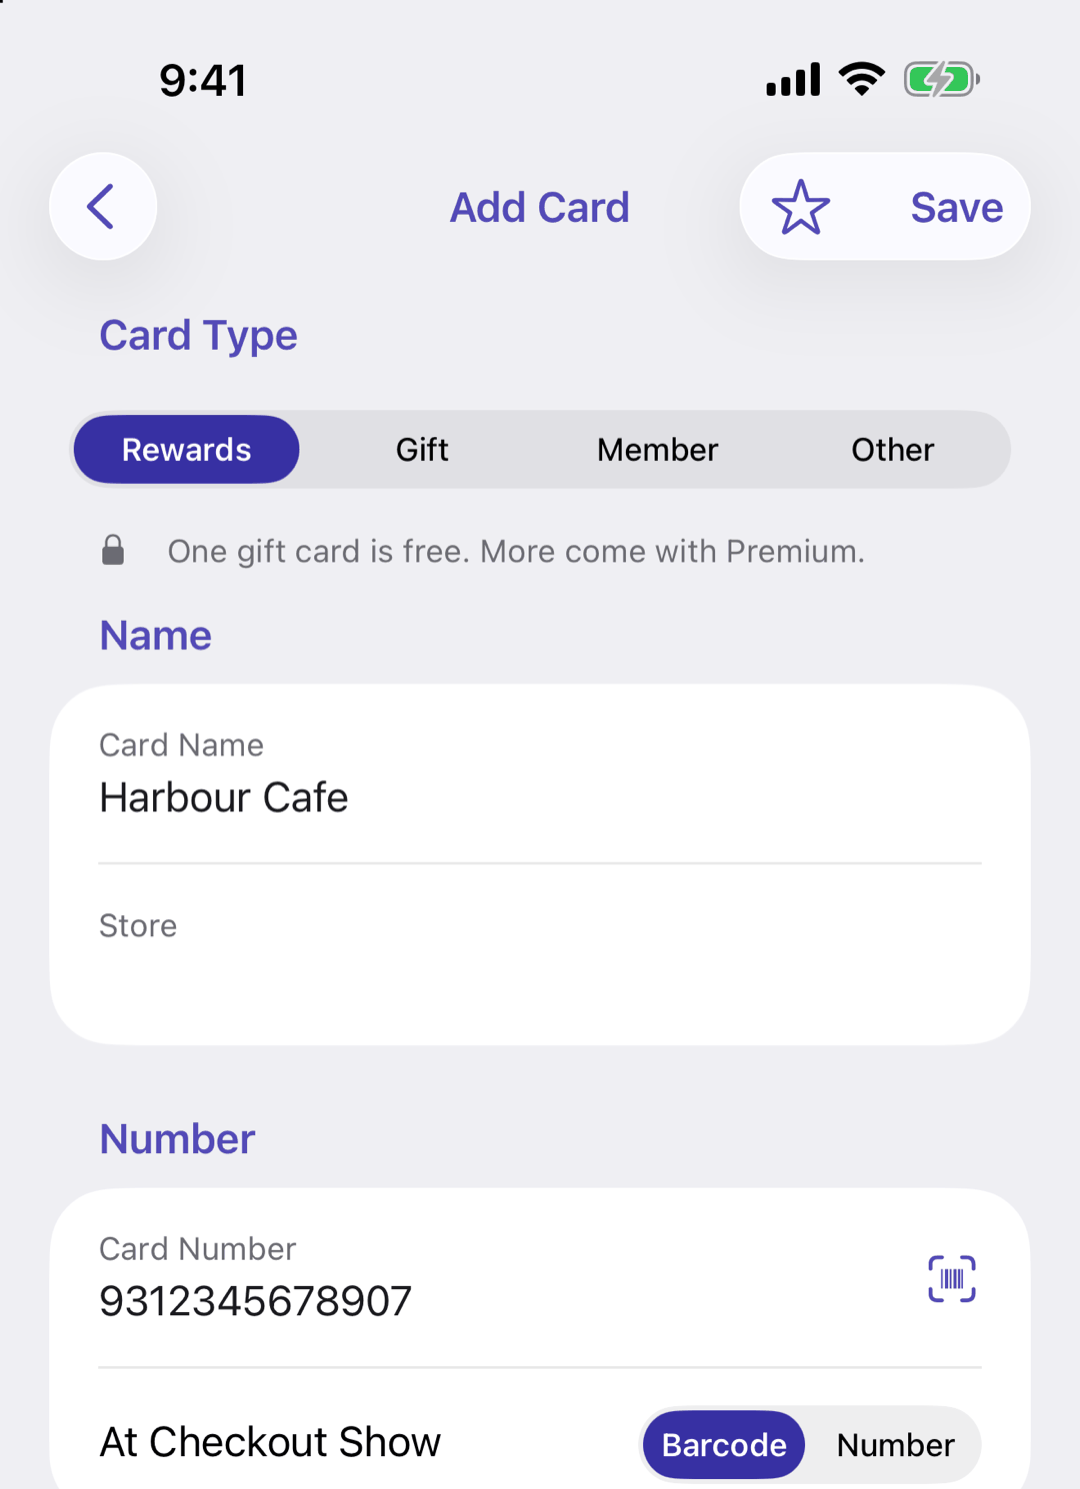
Below: what the photos do, each field, and gift card details.
Going deeper
The photos
Fit the card inside the frame; Cardly crops and straightens it. On the review screen you can Crop, Rotate or Retake. The front photo fills in the card's name, if it is still blank, and sets the card's colour, adding it to your palette. If you skipped the scan, the back photo's barcode is used.
The fields
- Card Type: Rewards, Gift, Member, Other, and any types of your own
- Card Name (needed to save) and Store
- Card Number, with a scan button to read it from the camera. Cardly picks the barcode type from the number
- At Checkout Show: Barcode, or Number for cards the cashier types in
- Colours: the card's Background and its Name colour, which is Auto unless you choose one
Gift cards
Choose Gift and the form adds a PIN, the Current Balance and Starting Balance, an Expiry date, and Link a Rewards Card. The name fills itself in as “(Store) Gift Card” until you type one. The expiry date is kept only with a Current Balance. The free version has one gift card.
Duplicates
If another card already has the same barcode, Cardly asks: Add Anyway or Cancel.
Questions or feedback? Email us at woohoosoftware@gmail.com